Shelf Staking
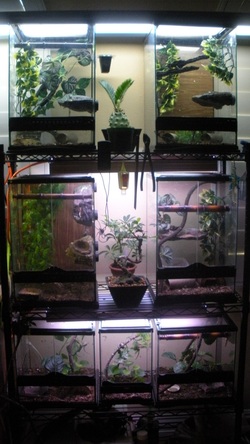
This has been one of the most successful methods so far.
Because multiple tanks can be set next to each other each shelf requires only one light.
With this style of shelving I can move each shelf independently up or down allowing me to have different shelves at multiple heights. The bottom shelf is lower to allow for the smaller hatch-ling tanks. Each shelf gets progressively higher allowing room for taller tanks. By allowing room between all sides of the tanks they are easily cleaned or removed without disturbing any other tank. The disadvantage is that accessing the top of the tanks is not very easy. With this method all tanks should have a front opening door.
Building Your Own Wooden Tank
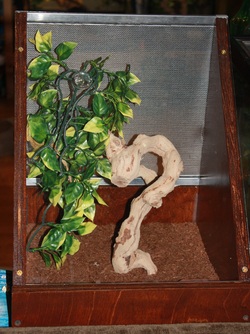
Creating your own wooden tank can be fun and exciting. Wooden tanks come in all sizes and shapes and can be any size.I build these custom wooden tanks with a 45 degree front view.
Staining and Water Proofing Step By Step
Staining and Water Proofing Step By Step
- I find it easier to cut all the pieces out before staining or waiter proofing and stain them individually.
- After cutting all the pieces they have to be prepped before they can be stained or water proofed. First get a damp cloth or misting bottle and apply a small amount of water to all surfaces of the wood. Allow the water to dry naturally and you will find the wood now has a rough feel to it.
- After getting the wood wet sand in down with 150 grit sand paper. The wood will feel soft to the touch.
- I then hang each piece up so I can stain them all at once.
- Now you can apply the first layer of stain or water proofing substance of choice.
- After staining to color applying two coats of water sealant sand again lightly with 280 grit sandpaper. This will give it a smooth glassy feel.
